Unlike Windows, MacOS doesn’t offer a lot of options to find and remove duplicate photos. Photos captured on iOS are of large size and quickly fill up storage. When we capture images in burst shots, we eat up almost 100 MB or higher. When we run out of storage space on iOS, we transfer all our memories to our Mac without removing duplicate photos.
There are several reasons why we may have duplicate photos on our Mac. Before you go ahead and clean up duplicates from Mac, let’s figure out the reasons behind duplicate photos. The best practice is to filter and delete duplicate photos on your iPhone before you transfer your photo albums to your Mac. Let’s explore the best manual methods to remove duplicate photos before you make use of the Best Duplicate Photo Finder and Remover for Mac.
How to Remove Duplicate Photos on Mac
Before you make use of an automated tool, you can explore manual methods to delete duplicate photos. We require the automated method if we are dealing with a lot of photo albums.
Delete Duplicate Photos With the Photos App
The inbuilt Photos App on Mac is the default photo viewer for MacOS. It allows you to preview your photos in different viewing modes. You can use the arrow keys to go next and filter our duplicate photos. If you are trying to add new photos, it will automatically identify newly added duplicate photos. Sort photos by different categories like date, name, or size and quickly delete duplicate photos.
Step 1. Open the Photos App to preview your images.
Step 2. Click on the File menu and go for the ‘New Smart Album’ option.
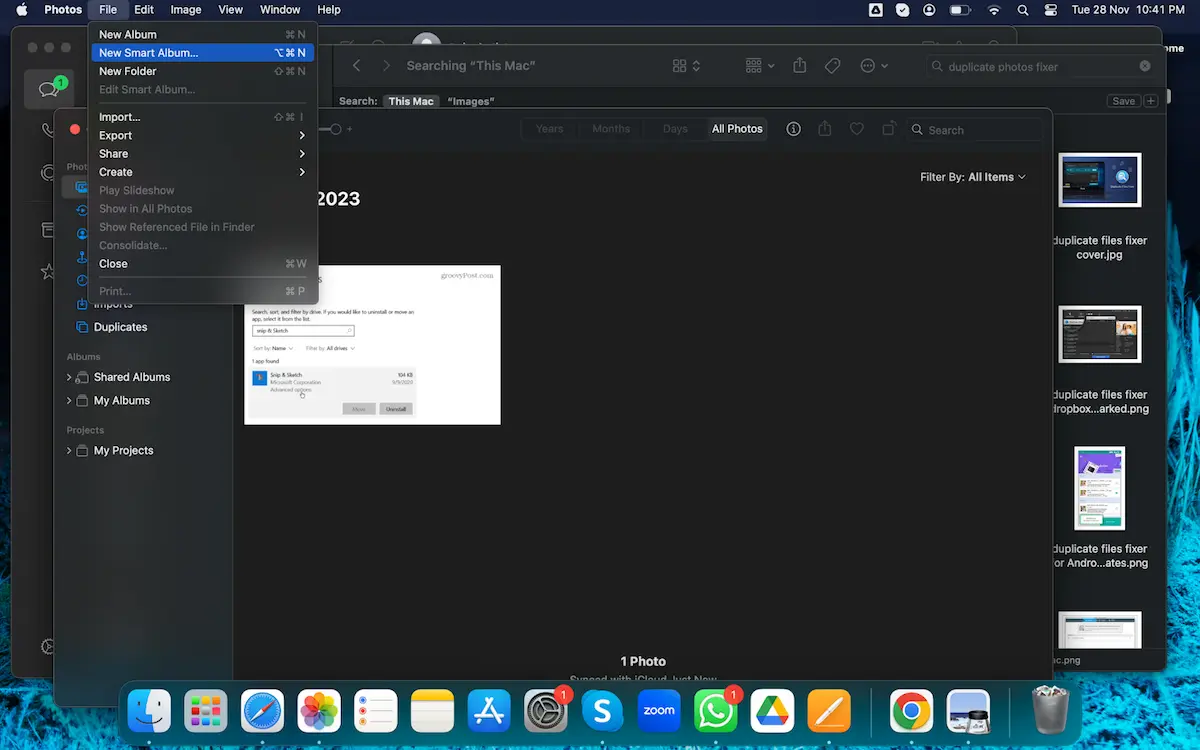
Step 3. Name your new smart folder and click on the [+] sign to create filter criteria.
Step 4. Change the view mode and view thumbnails of all the images.
Step 5. Click on the pictures that need to be deleted. Right-click and click on the ‘Move to Trash’ option.
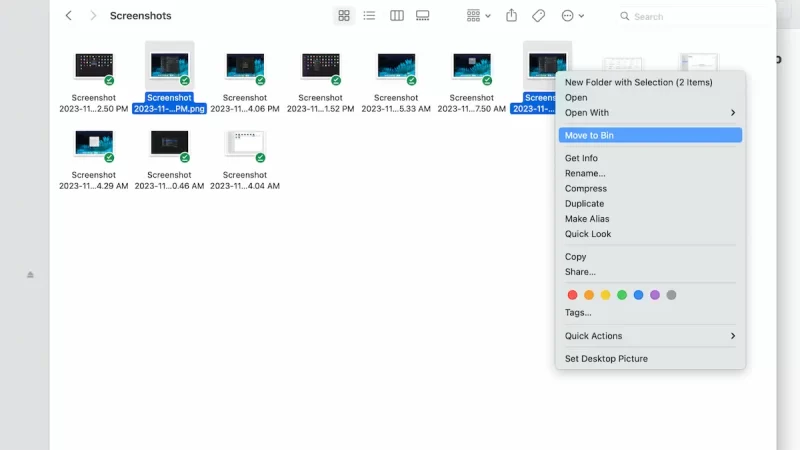
Step 6. On confirmation, click on the Delete button to approve deletion.
Step 7. Once deleted, click on the Recently Deleted folder in the left panel.
Step 8. Press the Command + A keys to select all and click the Delete All button at the top.
Duplicates Option in Photos App
The Photos App on your Mac comes with a new feature that filters all the duplicate photos in an album. This duplicate Finder utility can quickly scan all albums and list out all the found duplicates for you to eliminate them.
Step 1. Click on the Photos App on the Dock.
Step 2. Click on the Duplicates folder in the left panel. Let it scan and come up with the found duplicates.
Step 3. Hold down the Command key and click to select multiple images.
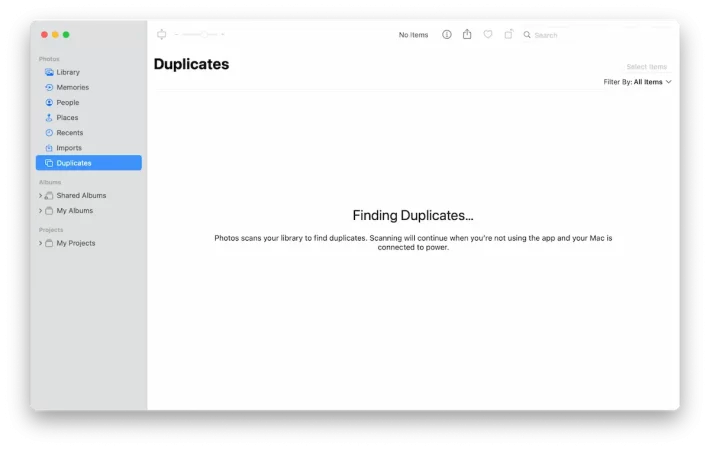
Step 4. On the top of the window, you will find the Merge [X] Items option. Click on it and it will merge and keep the best photos and delete duplicate photos.
Step 5. The deleted photos are still there on your Mac. You need to access the Recently Deleted folder in the left panel.
Step 6. Click on the Delete All button on the top to permanently delete these photos from your Mac.
Delete Duplicate Photos Using Finder
The Finder utility is used to explore files and folders and you can quickly explore all the photos in an album. You can follow these steps to quickly look into the albums and find duplicate photos on Mac.
Step 1. Click on the Finder app on the Dock.
Step 2. Go to the File menu and select the ‘New Smart Folder’ option.
Step 3. Select ‘Photos’ to search just the photos album or ‘This Mac’ to search in all the folders.
Step 4. Click on the [+] Plus button to specify a search criteria.
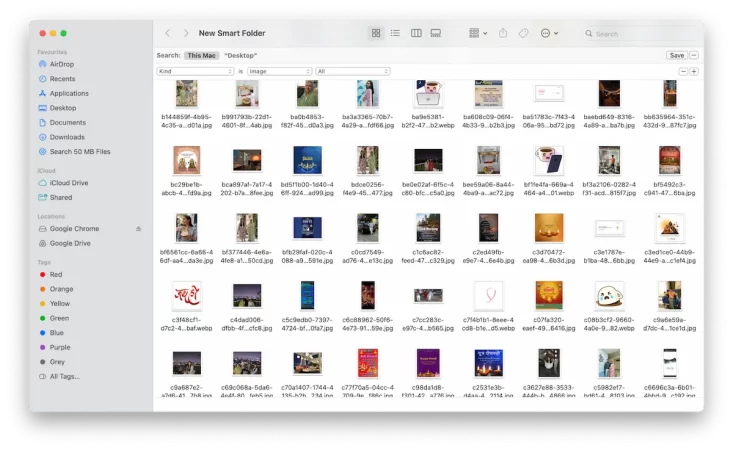
Step 5. Create new filter criteria like Type as Images and select All or jpeg or the type of images you wish to search.
Step 6. Ensure you have a show option as Grid (Icons) to view thumbnails of all the images. You can right-click on the empty area and click on the Show View Options to change the thumbnail size of your choice.
Step 7. Hold down the Command key to select multiple duplicate images in the search folder. Release the Command key when you scroll down and look for more duplicates.

Step 8. You can hit the Delete key or Right-click on any of the selected images to select the ‘Move to Trash’ option. This will send all the selected images to the Trash Bin.

Step 9. Ensure you go to the Trash Bin and empty the Trash.
Cleanup Duplicate from Mac Using Duplicate Photo Finder App
All the above steps may not attain accuracy. There are chances of deleting all the versions of photos including the original ones or you may not look into all the folders. You can attain accuracy with the help of the Best Duplicate Photo Finder Apps for Mac.
Duplicate Photos Fixer Pro
Duplicate Photos Fixer Pro is one of the Best Duplicate Photo Finders for all the latest versions of MacOS, Windows, iOS, and Android devices. You can scan any internal or external storage device to look for duplicates and delete duplicate photos just with a few clicks. This is the easiest method to quickly find and remove duplicate photos on Mac.
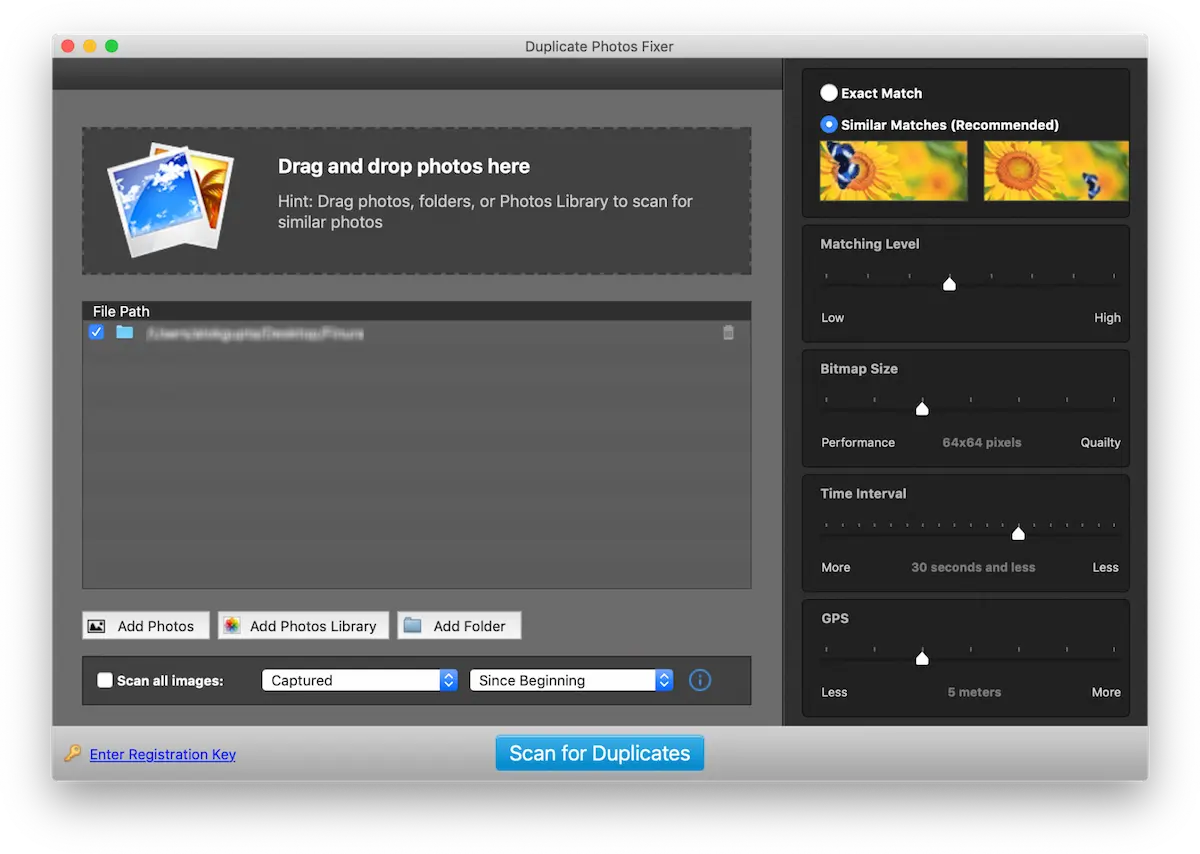
Step 1. Download and install Duplicate Photos Fixer Pro on your Mac from the official website.
Step 2. Configure the settings and activate your product with a license key.
Step 3. Select the storage device that needs to be scanned.
Step 4. Let it run the scan and come up with scan results.
Step 5. Preview images and select all the duplicates that need to be deleted.
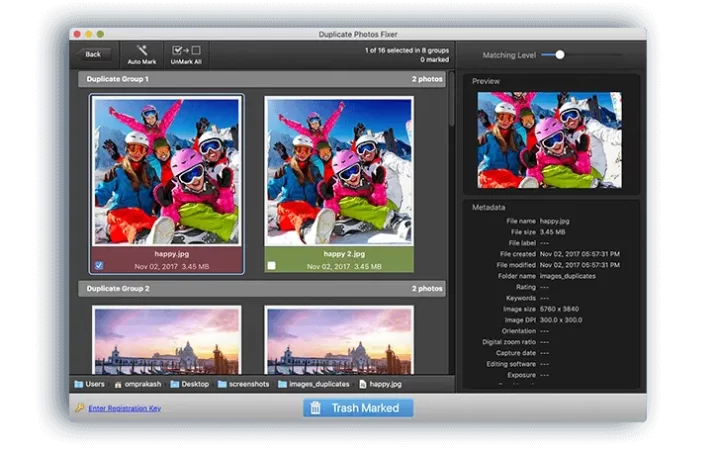
Step 6. Click on the Trash Marked button to send all of them to the Trash Bin.
Step 7. Ensure you right-click on the Trash and hit the Empty Trash option.
Final Words
This article on ways to remove duplicate photos on Mac has the best manual methods to browse and find duplicates from less number of folders. If there are a lot of albums to scan. The Best Duplicate Photos Fixer Pro utility will automate the process of finding and deleting duplicate photos. These steps will help you clean up duplicates from Mac and free up space from Mac. Keep it Clean!


Leave a Reply